As my colleagues and I at Ensynch, specifically Brad Turner and David Lundell, were digging into ILM 2.0 Beta 3, the power of the new Processing features that are built into this new version took us on a wonder journey that started generating ideas about how we could use this to facilitate all sorts of cool add-ons that you would potentially want to have happen when a part or all of a person's identity changed.
I mean, when a new employee was added could we add a custom activity to the ILM library of activities that would calculate a unique user name? Could we create an activity that would allow us to easily integrate with an external system and be easily configured to access that system and return some key data value or values that we could add to the request stream. Could we then make use of that data in the action step to fill in extended properties in the target object of the request that represented that external system?
We thought, "we have to learn how to make this work". So, in my first set of blogs, ever, I am going to layout the basic steps to create a custom ILM workflow activity. I'm going to lay this out from the perspective of an Infrastructure Engineer who has done some dabbling into code with Visual Studio but who does not make a career out of developing but would rather spend their time coordinating and configuring ILM for their customers and companies.
What's nice about this activity is that it posts diagnostic records out to a log file, of your own choosing, which prints out all the parameters of the workflow, the request object and the target object. You can insert this activity before and after any activity in your ILM Process in order to track what is happening to these parameters as your workflow runs. This can help ILM administrators create and debug Process Flows without the need to writing custom code to analyze problems they might encounter along the way.
In fact we don't actually get to the code until second post so bear with me and all will be revealed over the next couple of weeks.
To create the custom activity we have designed here you will need an implementation of the ILM 2.0 Beta 3 server with a copy of Visual Studio 2008 Professional Developer edition installed. You will be working directly on the SharePoint server that the ILM portal has been installed on. In Beta 3.0 the installations have all the ILM components installed on the same server or virtual machine. For the Beta 3 release the library we are going to create will have to be installed both in the Global Assembly Cache (GAC) as well as the _app_bin folder of the ILM SharePoint Portal. These instructions may change for the Release Candidate (RC) but for now the need to copy the library to both locations is a requirement.
By the way I will be creating this example in C# but the code is easily translatable unto VB.
Creating the Visual Studio Project
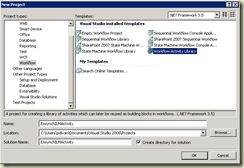
The first step in this process is to create a Workflow Activity library as shown in the figure below.
Figure 1‑1 - Creating WF Project
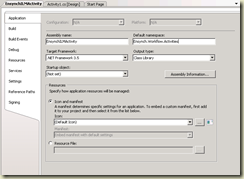
Once the project is opened we want to preset a few things. We want to set the default namespace to something more meaningful than out project name. In my case I am going to be using two namespaces, one for the workflow activity (EnSynch.Workflow.Activities) and another for the user interface component of the activity (EnSynch.ILM.Activities).
In the Solutions Explorer Right click on the EnsynchCustomActivities project and select "Properties"
Figure 1‑2 - Visual Studio, changing default namespace
Change the name of the "Default namespace" field to "Ensynch.Workflow.Activities". Save this configuration and close the property sheet;
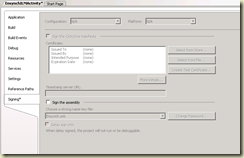
Now select the Signing tab on the left side. Since we are going to have to place our library into the Global Assembly Cache (GAC) we need to have a signed library.
Check the "Sign the assembly" checkbox and select the <New…> option from the dropdown list.
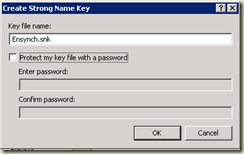
In the Create Strong Name Key dialog box enter a name for your key file (in my case I entered Ensynch.snk) uncheck the "Protect my key file with a password" checkbox and press OK.
Do a Save All on your project and close the properties window.
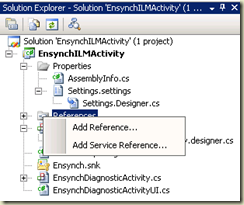
We need to add the ILM libraries as references to our project. In the solutions explorer, right click on the References folder and select “Add Reference”
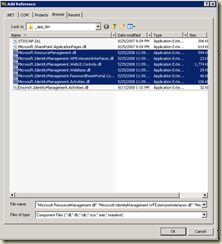
Select the Browse tab.
Browse to the _app_bin folder of your SharePoint. Select all the ILM libraries as shown in the figure below. Press OK
Do a Save All on your project.
You can delete the Activity1.cs file.
So that's it for this entry in Part II I'll show you how to create the custom workflow activity and then in Part III we'll create the ILM user interface class and install and configure the completed assembly up to ILM.


No comments:
Post a Comment